
Enhancing Your Blogger Blog Transitioning From wealthytrench.blogspot.com to wealthytrench.com Using Custom Domain Name.
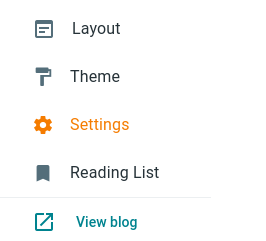
1. First Go to the blogger setting and find out custom domain
You should click on your blog’s settings, Which you will easily find on the left side of the blog
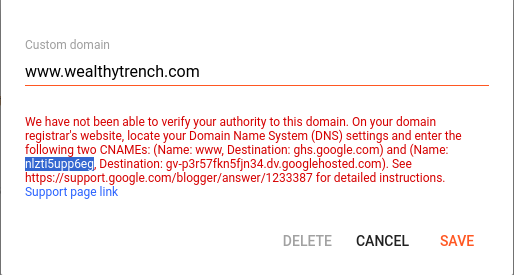
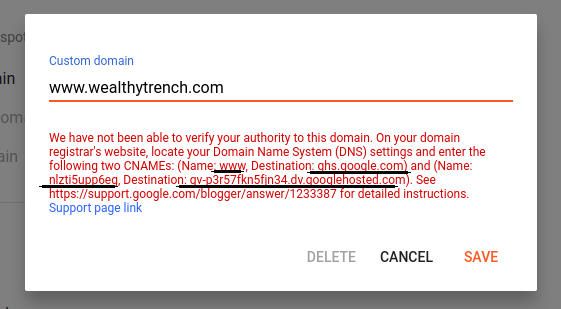
2. Write custom domain in field like www.wealthytrench.com
There, you will find ‘Custom Domain’ written in the publishing section. Click on it and enter your domain as shown in the image below.
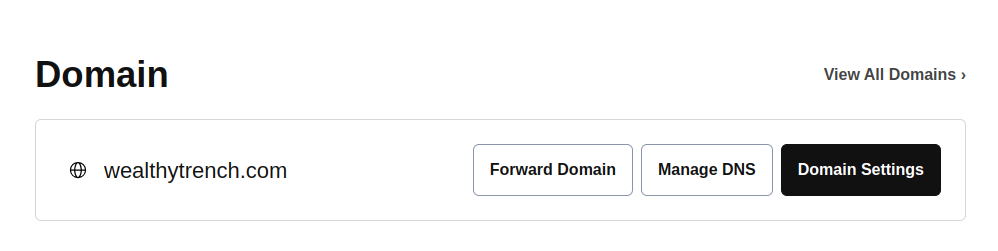
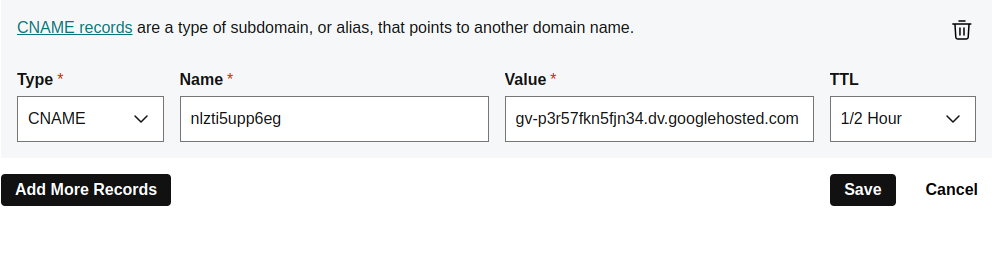
3. Open Domain DNS records in godaddy
Next, click Manage DNS of your domain. Your domain will be with any domain registrar, and you will find DNS settings in all of them.
4. Replace the existing CNAME record with Blogger
Afterward, you need to update CNAME records. Add ‘www‘ in the name field and ‘ghs.google.com‘ in the destination field, As shown in the photo below. the first CNAME records is same for every blogger user.

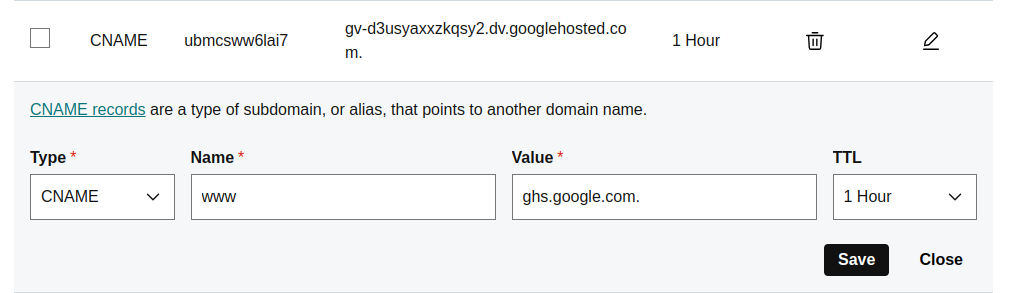
6. After CNAME record update Your Domain Successfully connect with your domain
Adding another record is a unique process for each user. Copy the second name and destination carefully, and then add them to your second CNAME record. Samples are provided in the photo below.
Then click on the Save button, it may take some time for the DNS to update
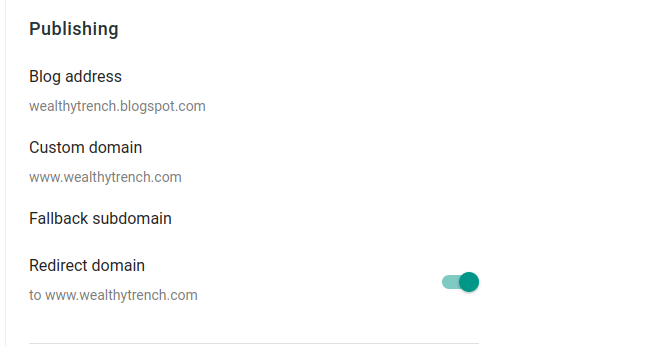
7. Don’t Forget to redirect Redirect domain
Your domain is now connected with Blogger. Next, click on ‘Redirect Domain.’ This helps in opening your website from wealthytrench.com to www.wealthytrench.com.
8. Start HTTPS Availibility
At the same time, click on the following options: ‘HTTPS Availability’ and ‘HTTPS Redirect’ so that your website will have an SSL certificate.
